An Introduction to Electronically-Assisted Astronomy (EAA)
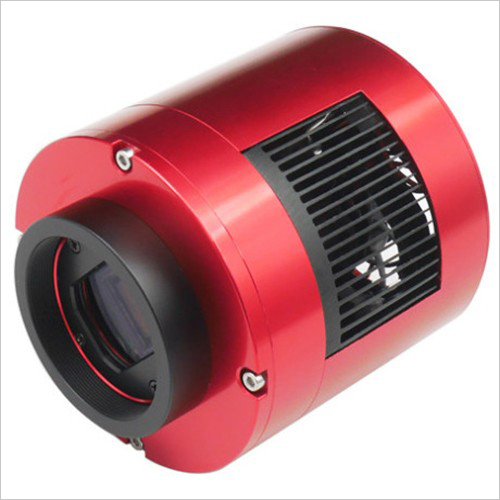 Figure 1 – The ZWO ASI294MC-Pro CMOS camera, a popular choice for electronically-assisted astronomy (EAA)
Overview
In this Q&A article, we speak with amateur astronomer Jim Thompson about the basics of electronically-Assisted Astronomy (EAA). EAA is a relatively new and often misunderstood pastime, one that sits somewhere in the continuum between strictly visual observing and hard-core astrophotography. As a long-time EAA aficionado with a decade of experience, Jim is the perfect guide for observers who are curious about EAA or who may wish to actively move into this rewarding branch of amateur astronomy.
Jim has long been a presence on astronomy forums and has leveraged his technical expertise as an aerospace engineer to make many detailed and useful reports related to filters for visual observing and astrophotography. He has authored several magazine articles, including pieces for Astronomy Technology Today and Astronomy magazine.
Jim lives with his family in Ottawa, Canada, and often employs the tools of EAA to pull dim objects out of badly light-polluted sky. As he says in this article, if it weren't for EAA, he likely wouldn't be active in astronomy today.
You can see more of Jim's work at the website of his Abbey Road Observatory.
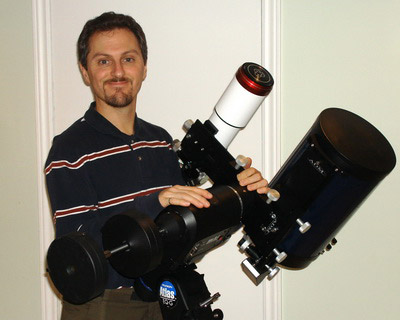 Figure 2 - Jim Thompson
Q. What's a useful working definition of EAA?
A. The definition of the term "Electronically Assisted Astronomy" has evolved over the years in response to the changes in technology that have become available to amateur astronomers. In general, though, the application of any sort of technological aid for the enhancement of astronomical viewing falls under the EAA umbrella. Devices such as light intensifiers and video cameras both fit into this category. The purpose of the technological aid is either to increase the observable detail over what's possible with a conventional eyepiece, or in some cases to make it possible for those with vision problems to see anything at all.
 Figure 3 - A Mallincam astronomy video camera for EAA in a CelestronEdgeHD telescope. Image credit: Rod Mollise
Q. How does EAA differ from astrophotography or conventional "video astronomy"?
A. EAA is a broad term that's often divided into sub-categories based on the effort or time involved in generating an observable image. At one end there are light (or image) intensifers which provide a view most similar to looking directly through an eyepiece. These devices provide an immediate visual enhancement.
Next comes what has been traditionally referred to as "video astronomy". Video astronomy cameras use a CCD or CMOS based camera to present a continually updated image of an astronomical object. The camera refreshes the image in seconds to tens of seconds, and the output of the camera is visible on a video or computer monitor.
Then there is astrophotography, where image data is collected over the course of tens of minutes to hours, and then combined and processed to produce a final image after the fact.
Between video astronomy and astrophotography is a wide grey area where the quality of image the user observes is determined by the amount of time they want to invest. Within this grey area the user can employ a large variety of cameras and techniques, but in all cases will be observing via an integrated software package that is capable of stacking image frames in real-time and sending the image to a monitor.
Q. What are the main camera or detectoroptions for EAA?
A. I cannot comment on the range of technologies available in light intensifiers as that is not my background. My experience is with the use of cameras built around focal plane array sensors based on either CCD (Charge Coupled Device) or CMOS (Complementary Metal Oxide Semiconductor) technology.
For a long time, CCD-based cameras have been the camera of choice for EAA due to their superior image quality and sensitivity. The CCD's sensor architecture also makes them more amenable to customization for the EAA market. The larger cellphone and security camera markets, however, have directed sensor development towards more capable CMOS-based sensors, primarily because it's less expensive to produce a CMOS-based camera than one based on a CCD. As a result, there are now a wide variety of CMOS-based cameras suitable for EAA. Even with the development of these new more capable CMOS sensors, the CCD based camera has a place in EAA because it is still the better performer in the time-to-observable-image (TTOI) range of tens of seconds. This range is close to viewing in nearly real-time while still delivering good images.
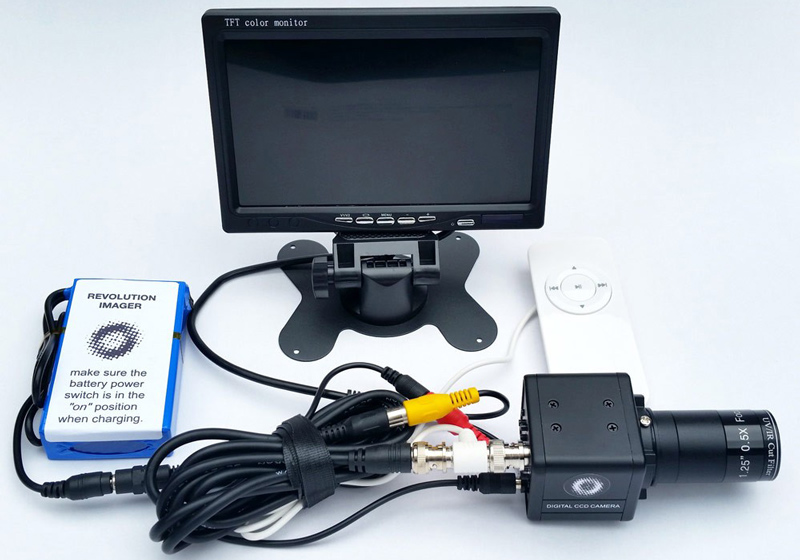 Figure 4 - The Revolution Imager EAA system (Credit: Revolution Imager)
Q. What makes for a good EAA camera, both video and CMOS/CCD?
A. There are many characteristics that are desirable in a good EAA camera. The most important characteristics depend on what the user is trying to achieve. A common trade-off is image quality or resolution vs. TTOI. There are however a few characteristics that are important regardless of the user's individual requirements:
High Sensitivity. In deep-sky EAA, these cameras have very little light to work with so it's important they have a high sensitivity to light. The efficiency with which a sensor converts incoming photons into electrons that can then be collected and measured is called its Quantum Efficiency (QE). The higher the QE the better, and 100% is the maximum. Sensors with QE's greater than 75% are considered quite good.
Another measure of sensitivity that's sometimes used is a value in millivolts (mV) output by the sensor when it's looking at a calibrated light source through optics with fixed properties. Sensitivity in mV is commonly reported by Sony, the major sensor manufacturer for EAA, although they tend to slightly change the test conditions from sensor to sensor which makes it tricky to directly compare one sensor to another.
Low Noise: Since the objects we are trying to observe often do not appear that much different than the background sky, it is important to minimize the amount of noise that exists in the image produced by our camera. The net noise level comes from a combination of sources: thermal noise from the sensor heating up, electronic noise from the sensor and other circuitry within the camera, and the natural statistical variation in the number of photons received from your observing target, a quantity called "shot noise". Luckily for us there are many technologies available for reducing some of these types of noise, and sensor development continues to push these noise levels lower and lower. Noise and sensitivity are often combined into a single figure of merit for a camera called the Signal-to-Noise Ratio or SNR. The user wants as high an SNR as possible to capture the faintest of deep-sky objects.
 Figure 5 - The Lagoon Nebula (M8). A stack of three images of 30s, 90s, and 120s with a Mallincam Extreme video cameras with a Meade 8” LX10, focal reducer, and light-pollution filter. Credit: Jim Thompson.
Ease of Use: This is a difficult characteristic to quantify but is equally important to the other two. Depending on a user's tolerance for having to fiddle with the camera to get what they want, one camera model may be better than another. There are often trade-offs between performance and convenience. For example:
- Because they have large pixels, CCD-based astro-video cameras still provide the shortest TTOI possible in a camera. These cameras however have the lowest resolutions and often require multiple cable connections for control, video out, and power.
- CMOS-based cameras are available in resolutions many times greater than CCD-based astro-video cameras, but the smaller sensor pixels do not gather as much light as CCDs and so longer exposure times are required to get an observable image. The higher resolution of these cameras also make optical aberrations from your telescope, focal reducer, and other accessories much more evident.
- CCD and CMOS cameras are available in a large variety of sensor sizes, which can be an advantage if the observer desires a large field of view. Larger sensors however place a burden on your optics and make it harder to acquire a uniform aberration-free image across the entire field of view, especially if you are trying to use a focal reducer.
- Many CCD-based astro-video cameras can still operate without the use of a computer, but all CMOS-based cameras must be used with a computer.
Q. Is a cooled camera required?
A. A sensor, whether CCD or CMOS, generates heat while it's accumulating charge and processing the resulting signal. This heat is observable in your image as noise. In some cases, the heat can cause individual pixels to light up brighter than the rest, creating a warm (somewhat bright) or hot (very bright) pixel. Actively cooling the sensor can greatly reduce the appearance of thermal noise, but it's not a necessity to achieve acceptable results. The random noise component can be averaged out by live-stacking multiple frames, and the warm/hot pixels can be dealt with by recording a dark frame at the beginning of your session and applying it as a correction while you're observing. Any good EAA software package will have these two capabilities built in already. If you don't want to use software, and you can't afford a cooled camera, there are still some cameras out there that give acceptable results with low noise. Considerably better results can be achieved, however, if you consider a camera with cooling and/or software control.
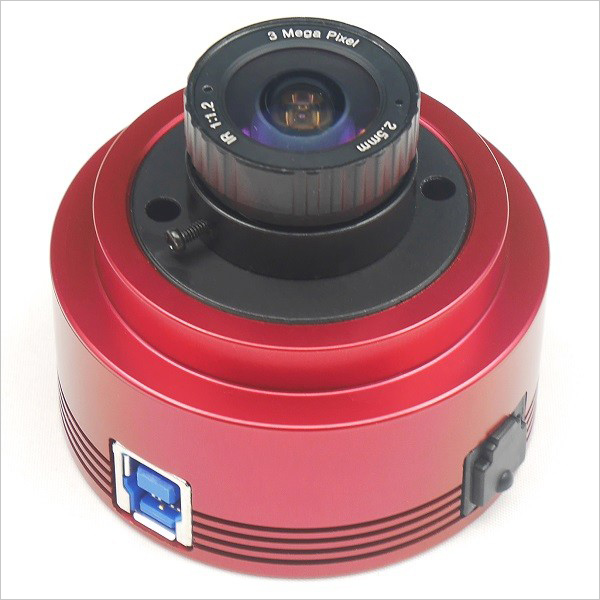 Figure 6 - A ZWO ASI 385MC camera, a CMOS-based astronomy camera that works well for astrophotography and electronically-assisted astronomy.
Q. What are the advantages offered by EAA?
A. To put it simply, EAA allows you to see what would otherwise not be possible to see using an eyepiece alone. One of the biggest advantages is the ability to see extremely dim objects. The user has control over how much light the camera gathers to generate an image. The longer you collect light, the dimmer an object you can see. Depending on how patient you are, there is no practical limit to how long or rather how "deep" you can go. For example, from my backyard in downtown Ottawa (in an urban area with a population of about 1 million), I can observe 18th-magnitude galaxies with little effort.
Another big advantage of EAA: a camera can see parts of the spectrum that our eyes cannot. At night our eyes are limited to a narrow band of the electromagnetic spectrum centered on the color green. A camera can see a continuum of light from near-ultraviolet wavelengths all the way up to near-infrared. This allows the user to observe at wavelengths not otherwise possible, especially the important Hydrogen Alpha wavelength of 656.3nm which is the main wavelength from emission nebulae. The broad spectral response of EAA cameras also makes it possible to observe in full color, something that is generally not possible to do with the naked eye. Generally, for color observing, a camera designed for color imaging is required.
There are secondary benefits as well. EAA makes it possible to observe remotely in nearly real time. It also makes it possible to easily document your observations by saving an image to a computer. And it makes it easier for visually-challenged observers to enjoy astronomy.
EAA is also a big help for astronomy outreach. It's much easier to observe and speak around an object on a video display compared to have having each member of an audience take turns looking through an eyepiece. It removes the problem of teaching people how to use a telescope properly, and it puts the emphasis more on the excitement and wonder of what you're actually looking at.
Q. What kind of objects can be best seen using EAA?
A. EAA can be used to look at anything, whatever you heart desires! Certainly, it's good to begin with easier objects like the Moon, planets, and Sun (with a safe solar filter of course). But as one's proficiency with the equipment improves, it does not take a very big step to move up to observing all of the Messier list objects. After that, as one becomes more and more skilled, NGC and IC objects all come into reach. Then you can push even deeper into more obscure nebulae and galaxy catalogs. To observe the more difficult objects will require experience with your cameraand an understanding of how some equipment is better suited for certain objects. For example, as a consequence the sensor size of commonly used cameras, an 8" or 10" aperture scope is better suited to observing galaxies and planetary nebulae, while a short 60mm to 100mm refractor is best for larger nebulae.
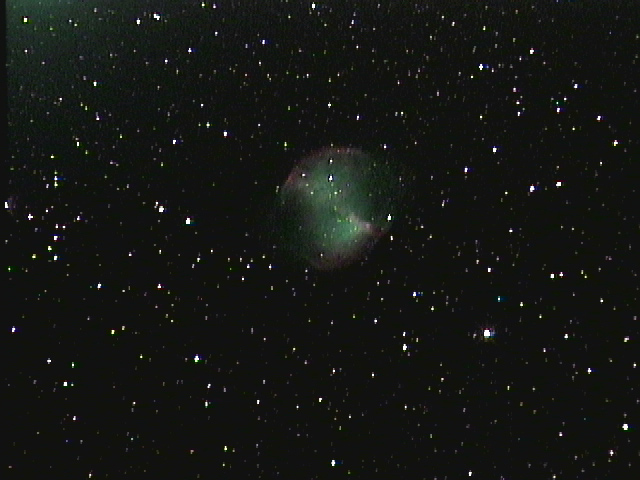 Figure 7 - The Dumbbell Nebula (M27) imaged with a Mallincam Extreme and a 6” RC reflector telescope and Lumicon Deep-Sky Filter. Credit: Brian Ventrudo.
Q. Is dark sky essential for EAA to be useful?
A. A dark sky is not essential for EAA. In fact, EAA has made unrestricted observation from heavily light polluted sites possible. It is fair to say that EAA is the sole reason I am still active in astronomy. Living in a large city and a busy work and family life are not conducive to eyepiece observing. Without the capabilities provided by EAA I would probably not be observing at all. That said, the benefits realized visually by going to a dark site to observe are also obtained using EAA at a dark site.
Q. What is some of the basic electronic terminology and settings that beginners should familiarize themselves with?
A. Below is a list of definitions for some commonly used EAA terminology:
Gain A user adjustable setting on a camera that controls the amount of electronic amplification that is applied to the signal. Using a higher gain setting will make the object being observed brighter, but it will also make the image noisier - the object signal and noise are both amplified equally, and some noise is added in the amplification process. Some cameras may refer to Gain as "AGC", which is an acronym for "Automatic Gain Control". Integration / Exposure Time The term "integration time" and "exposure time" are synonymous. They refer to the user setting on the camera which defines how long the camera will accumulate light to generate a single image frame. Refresh / Frame Rate The rate at which the camera can download and display a newly exposed image, measured in frames per second or FPS. Not typically of concern for deep-sky observers, but for users observing solar system objects a fast FPS is desirable to avoid the blurring that is caused by atmospheric turbulence. Amp Glow A general term used to refer to the appearance of a glow in the corner or along the edges of a camera image. It is a result of heat generated by parts of a sensor's circuitry that are visible to the sensor as infrared light. Amp glow tends to be most visible when using long exposure times, ie. greater than 60 seconds per frame. Most new cameras have the capability to minimize the appearance of amp glow as a built-in feature, otherwise calibration of your image using a dark frame will help to eliminate this. Light Frame A single image of the object being observed, collected at some specific gain and exposure time combination. Stack / Stacked Image An image made from an average of multiple individual light frames. The process is mostly automated now in EAA software, but involves the software comparing multiple frames and aligning them using stars as reference points before averaging on a pixel-by-pixel basis. Stacking is a very powerful method for reducing noise in your image, and consequently increasing image SNR and dynamic range. Dark Frame / Field A stack of multiple images taken with the same exposure time and gain settings as used when observing an object, but recorded with the telescope aperture covered. It is a type of calibration frame used to remove noise associated with the camera electronics, including amp glow and warm/hot pixels. Bias Frame A stack of multiple images taken with the same camera gain as used when observing an object, but recorded at the minimum possible exposure time and with the telescope covered. It is a type of calibration frame used to remove noise in the image specifically relating to non-uniformities between individual sensor pixel responses. Flat Frame A stack of multiple images taken with the same camera and telescope setup as used when observing an object, but recorded while observing a uniformly bright scene that fills the entire field of view. It is a type of calibration frame used to remove the variation in brightness across your light frame that is a result of your optics. Binning A method of trading off sensor resolution for an increase in effective sensitivity and/or increasing its SNR by combining pixels together. For example, binning a camera 2x2 will combine 4 native sensor pixels to make one effective pixel that is 4 times the area and thus 4 times as sensitive, but with only 2 times the noise, giving a net improvement in SNR of 2x. Binning can be implemented via hardware for those sensors that have the feature built-in, or it can be implemented via software. Most EAA software packages have this capability. Sensor Size The sensor size that is normally quoted is a measure in millimeters, taken diagonally from one corner to the opposite corner. Sensor size is also sometimes referred to in terms of a notional dimension in “inches” such as 1/2" or 1/3", even though in most cases the actual sensor size is not actually equal to these notional sizes. The notional sizing is more for selecting the correct accessories such as filters and lenses. It is important to know the size of sensor used in different cameras since it will have implications on things like Field of View and how well the camera will work with your telescope, filters, and focal reducers. (Sensor) Pixel Size The camera sensor is made up of an array of tiny individual sensors, each sensor represented by a single pixel in your camera image. There are a large variety of pixel sizes available today, providing a range of choices to the user depending on what they want. Small pixels are good if you want high resolution but it comes at the cost of low sensitivity. Large pixels provide better sensitivity but at the cost of a lower resolution. Mega Pixels (MP) This term is used to indicate how many total sensor pixels there are in the image sensor, where one mega pixel equals 10242 or 1,048,576 pixels. It is derived from the sensor size and pixel size. For two cameras with the same Sensor Size, the one with the largest MP rating will provide the highest resolution image. For many users, having a high MP camera is desirable but it should be noted that more pixels means more data for the camera and your computer to transfer and process, which can slow down your viewing experience or cause stability issues depending on your computer setup. Focal Ratio Also referred to as f-ratio, the focal ratio is a measure of how efficiently a telescope gathers light. It is calculated by dividing a telescope's focal length by its aperture (ie. diameter). For example, a 100mm diameter refractor with a 630mm focal length has an f-ratio of 6.3. A smaller number means light is gathered more effectively. So for the same focal length, the scope with the smaller f-ratio will require the lowest exposure time to generate an image of an extended object. Conversely two scopes with the same f-ratio will generate an image of identical brightness for the same exposure time regardless of aperture. Only the FOV will be different. Field of View (FOV) A measure of how much of the sky one can see in one camera image frame, measured in terms of an angle in degrees or arc-minutes. It is good to know what FOV you will achieve by combining your camera with different telescopes and focal reducers as it will affect how large different objects are in the image frame. Q. Can you describe a basic EAA set-up, say, for a beginner?
A. The basic components of any camera based EAA setup include a telescope, a camera, and something to view the camera feed on. In theory you can use any telescope for EAA, although some are easier to work with than others. Refractors and SCT's, because of their generous focus range tend to be easier to work with, although many people have had good success doing EAA with their Newtonian scopes.
Also, to really appreciate EAA, you should have a tracking mount. EAA is not impossible with a manual mount, but the length exposure will be greatly limited if you don't have tracking capability.
With regards to a camera, I recommend beginners keep it simple. There are many relatively inexpensive choices available today (see list below). They may not provide the best available performance, but they will give you a good appreciation of what is possible with EAA and they will help you to develop your skills before you commit to a larger investment.
Some relatively inexpensive "beginner" cameras for EAA:
- Mallincam Micro (analog)
- Mallincam SkyRaider AG1.2C (USB)
- ZWO ASI224MC and ASI385MC (USB, cooled and uncooled)
- Revolution Imager R2 (analog)
- Altair GPCAM2 224C (USB)
To view your camera feed, you will need some sort of monitor. In the case of an analog video camera, the monitor needed to view your image can be as simple as an old TV. Personally, I use a laptop computer with a video capture device so that I can record as well as view what my camera shows me.To capture an analog signal on a computer, a device which converts the signal to digital format is required. For USB based cameras, which output an inherently digital signal, the only option is to use a computer to view your image.
Q. What are some key accessories that a commonly required?
A. Probably the most important accessory is a focal reducer. This is an optical component that threads on the end of the camera to shorten the effective focal length of your telescope. Adding a focal reducer increases the FOV of your camera, and it also decreases the f-ratio of your telescope so that you can use less exposure time.
If you plan to observe from a light polluted site, a light pollution filter is also a very useful accessory. There is a wide assortment of filters available that will work well with your EAA camera, many of which are meant for eyepiece observing. So you may already have one in your toolkit. It's best to use a filter that has good response to O-III and H-alpha wavelengths so you can use it on nebulae, and good response to infrared (wavelengths >700nm) so you can use it on galaxies.
A final accessory that is highly recommended is a focusing mask. The most common is the Bahtinov type, which you can find pre-made from astronomy retailers or you can design and build your own with free tools online. The purpose of the mask is to make focusing easy and reliable.
Q. Can you describe a more sophisticated EAA set-up?
A. Once you have gained some experience using a basic EAA setup, then you can consider whether to enhance your capabilities. The first enhancement is your telescope. Focal length is tied to the size of objects you want to observe, but ideally you can minimize the f-ratio while keeping a good quality image. As a result, SCT's with Hyperstar are popular among the most serious EAA enthusiasts. These set-ups give a very fast focal ration of f/2. Short focal length scopes, or astrographs, are also of interest to the more serious EAA user.
To observe the dimmest objects or to capture the highest resolutions also requires a computerized equatorial mount.
And for the camera? Users looking a better EAA experience tend to move in one of two directions: more sensitive, or more resolution. The highest sensitivity is provided by thermo-electrically cooled (TEC) CCD cameras, of which only a few different types still exist on the market. But the highest resolution is provided by the latest models of CMOS based cameras. In either case the increase in capability comes at a higher cost.
The final component of a more sophisticated setup is software. The ultimate in capability comes from software-based tools like live stacking, dark frame correction, and histogram adjustments. In addition, software can provide a path to remote observing so you don't have to stand shivering next to your scope to observe the night sky.
Q. Is an equatorial mount required? How about guiding?
A. An equatorial mount is not required to enjoy EAA. The limitation on total exposure time due to field rotation, the effect of the sky appearing to rotate as your ALT-AZ mount tracks across the sky, is much less of an issue now when you use the frame stacking tools available in EAA software today. However, the best results will come from using an equatorial mount.
Similarly, guiding is not essential for EAA. For example, I have never used guiding and do not feel that this has resulted in any significant reduction in my capabilities. I do, however, use a well aligned equatorial mount which mitigates much of the need for a guider.
Q. How does the learning curve for EAA compare to astrophotography?
A. This is a difficult question for me to answer since I have no experience with astrophotography. Anecdotally, I have heard from other EAA users that EAA is considerably simpler than astrophotography. The equipment requirements are probably similar: a tracking mount, good focusing, use of filters, and the use of a camera with software to acquire image data. The major difference lies in what happens after the image data is collected. In EAA, there is very little to be done after the image is on the screen. There are some tools to enhance your live image, but otherwise the amount of required post processing is very limited. In astrophotography there is still a significant effort remaining after the collection of your image data.
Q. What software is required to control the camera and view the images? How about for capturing still and video images?
A. It is possible to enjoy EAA without the need for a computer at all. There are still several analog video cameras available on the market which can display directly to a monitor or TV. The user of an analog video camera also has the option to capture the video to a DVR, or to a computer via a video capture device. Miloslick is an integrated analog camera control and live video processing software that permits image capture. Sharpcap can also be used with analog video cameras, but it will not control the camera.
For USB based cameras, the most versatile and universal of software for camera control and image processing is Sharpcap. Sharpcap has a very capable freeware version as well as a paid pro version. There are a few other proprietary software packages available for USB cameras, for example: MallinCam Sky for use with their SkyRaider series of cameras, AltairCapture for use with their GPCAM line of cameras, Starlight Live for use with Starlight Xpress cameras, and the Infinity software for use with that model of camera from Atik.
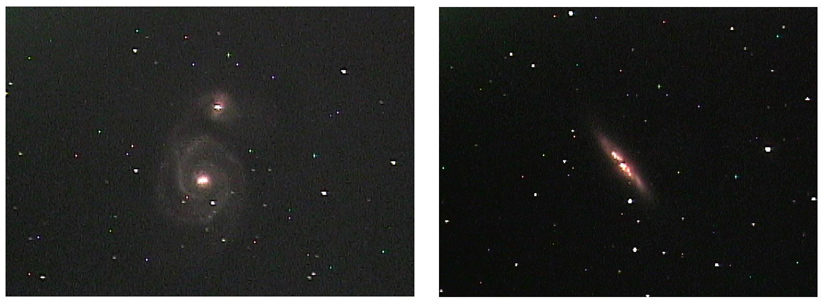 Figure 8 - A 90s integration of M51, the “Whirlpool” galaxy in Canes Venatici (left). Irregular galaxy M82 with a 56s exposure(right). Both images captured with a 6” RC reflector and 0.5x focal reducer in highly light-polluted skies with a Lumicon Deep-Sky Filter and Mallincam Xtreme. Credit: Brian Ventrudo.
Q. What are some good targets for a beginner to look at on the first few nights?
A. The easiest target to start with is just your daytime surroundings. There is a lot to be gained by setting up during daylight hours and getting used to how everything fits together and works with the software. Depending on what scope you are using you may need to find a object quite far away to achieve focus with your telescope.
The next best target to learn from is the Moon. It is big and bright and offers a wide dynamic range. This makes the Moon a great target for figuring out how gain and exposure time affects the view, as well as the other image adjustments that you can make.
Once you are comfortable with setting up your camera and making adjustments, you can move to a deep-sky object. My favorite object for testing is M42, the Orion Nebula. It is a relatively bright and large object, and it's filled with lots of color and fascinating detail. In the summertime I switch to M8, the Lagoon Nebula, another fairly large and bright nebula with lots of detail. Nebulae seem to stand out as good targets for beginners because we are not used to observing them in color. The contribution to the object's appearance from H-alpha emission is striking.
Galaxies may be a tempting object for beginners to try as well, but they can be more challenging. Seeing conditions and light pollution have more impact on how these objects appear compared to nebulae. If you do want to cut your teeth on some galaxies, try sticking to those on the Messier list, with M51 being one of my favorites. Globular clusters are also a relatively easy target for EAA, but they do not tend to be as impressive through a video camera as through an eyepiece.
Q. What, if any, useful science can an amateur astronomer conduct with EAA? Or is this purely an aesthetic pursuit to enhance what we see with the naked eye through a telescope?
A. There are many different scientific applications for EAA. Basically, any astronomic endeavor that works with images can be pursued. For example, hunting for comets, near Earth objects, or supernovae can all be accomplished using EAA equipment. With some careful calibration the user can also collect occultation and astrometric data as well. The possibilities are really only limited by your imagination.
Q. What are some common mistakes for newbies? What are some things to watch out for?
A. A common mistake for newbies is trying to do too much at the same time. For example, on several occasions I have met beginners who purchased a new scope, mount, camera and laptop computer all at the same time, and were complaining about not being able to get everything to work properly. There will always be bugs to work out, in any setup. My advice is to work with one thing at a time and then add things on as you get the previous one figured out. For example, you should be very comfortable with setting up and using your scope and mount long before you think about adding a camera. I also recommend that you keep a log book. No matter how obvious a setup detail or software setting may seem today, for sure you will forget about it 6 months down the road and need to look it up sometime. I routinely keep a log every time I observe, taking note of the conditions, what equipment and software I am using, and the settings I used on each object observed.
Q. Where is EAA headed in the near future (2-3 years)? Do you see EAA being replaced by integrated telescope/electronic devices?
A. If you had asked me this question three years ago I would have said with certainty that the future was with bigger and better cooled CCD cameras. I would not have guessed back then how far CMOS based cameras would come in that amount of time. The success of CMOS cameras has been largely because of their low cost and the parallel development of software that effectively takes advantage of what CMOS sensors can do. I fully expect the trend we see today in sensor development to continue, with incremental improvements in resolution, noise level, and sensitivity. Unfortunately, EAA is not a large enough market to influence sensor development, so we will just have to cross our fingers that what works well for the machine vision and security camera business will also work for us.
I also anticipate that software capabilities will continue to improve, largely due to the tireless efforts of fellow amateurs. It is hard to say what might happen if EAA becomes more interesting to main stream astrophotography camera manufacturers. If in the end we have more choices, I think the result will be good.
Integrated telescope/camera type products may become popular in the future, but only if they are designed and marketed for beginners. I can't see them replacing separately configurable scopes and cameras for the more serious users. There is simply too wide a range of applications of EAA for a fixed scope/camera device to work well.
Q. Are there any websites to broadcast or live stream video/EAA images?
A. It was a chance visit to a video astronomy streaming site that got me initially interested in EAA. I highly recommend that anyone interested in EAA visit these websites so they can get a firsthand look at what can be achieved. These sites are also great places to ask questions and learn in more detail what is involved in getting into EAA. The two streaming sites that I am most familiar with are: nightskiesnetwork.com, and nsnlive.com.
Q. Where can people learn more about EAA?
A. EAA has grown tremendously over the past 5 to 10 years. There are people all over the globe using EAA as their main means of observing. To keep up with what the community is doing, it's best to join the various message boards that are available. Most of the camera manufacturers have their own blogs, forums, or social media sites. There are also a few open forums available where users of different brands of equipment can share their experiences. Below is a list of some of the more popular open forums:
***
This article is © AstronomyConnect 2018. All rights reserved.
Please login or register to watch, comment, or like this article.StellaMagna and Tony Armalis like this.
-
Final Announcement: We're Saying Goodbye to AstronomyConnect. Read Our Closing Notice.
Dismiss Notice
New Cookie Policy
On May 24, 2018, we published revised versions of our Terms and Rules and Cookie Policy. Your use of AstronomyConnect.com’s services is subject to these revised terms.